
Facebook remains the largest social media platform in the world, with more than 3 billion monthly active users — that's over one-third of the global population.
The quote above fully explains the reason for this blog's existence. Integrating Facebook Login into our mobile app is a crucial step to streamline the login process, given that many of our users are likely to have Facebook accounts.
Note: In my previous blog, I provided a hands-on tutorial designed to simplify the integration of Google Sign-In into a mobile app. You may want to read that blog first: Integrate Google OAuth in Expo React Native App with Firebase.
Prerequisites
- React Native project with Expo Managed Flow
- Node.js. Install the latest version here
- React Native Firebase modules
yarn add @react-native-firebase/app
yarn add @react-native-firebase/auth
yarn add @react-native-firebase/crashlytics
- React Native FBSDK Next
yarn add react-native-fbsdk-next
- react-native-sha256
yarn add react-native-sha256
- react-native-uuid (Optional)
yarn add react-native-uuid
All set. Ready to go?
1. Register as a Meta Developer Account
- Go to Meta for Developers
- Login to your account
- Select Get Started to register as a Meta Developer
2. Create an app in Facebook
To enable Facebook authentication, we first need to create a Facebook app. Let's go through the step-by-step process of how to create a Facebook app.
-
Log in to your Meta developer account and select My Apps
-
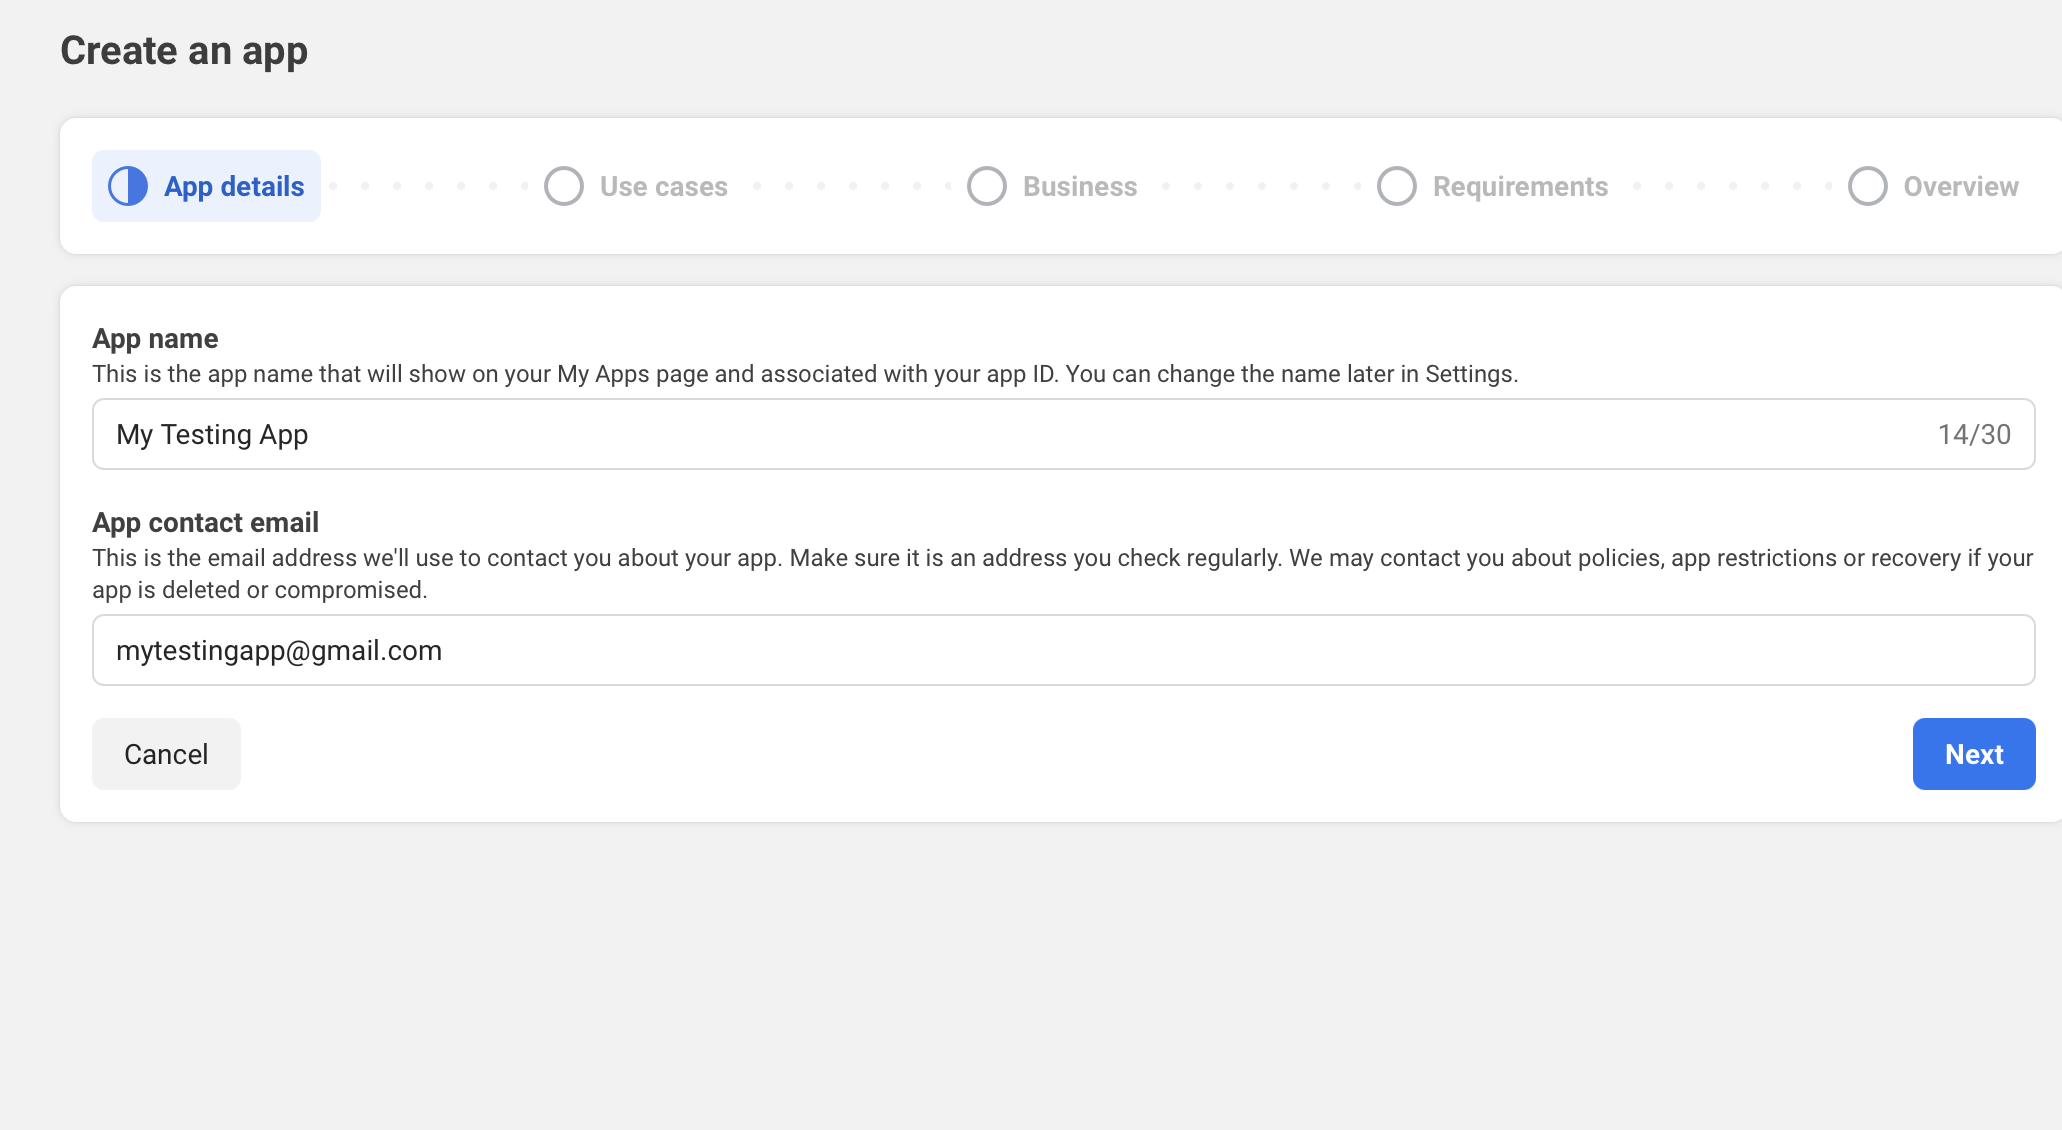
Select Create App. Fill in your App name and App contact email
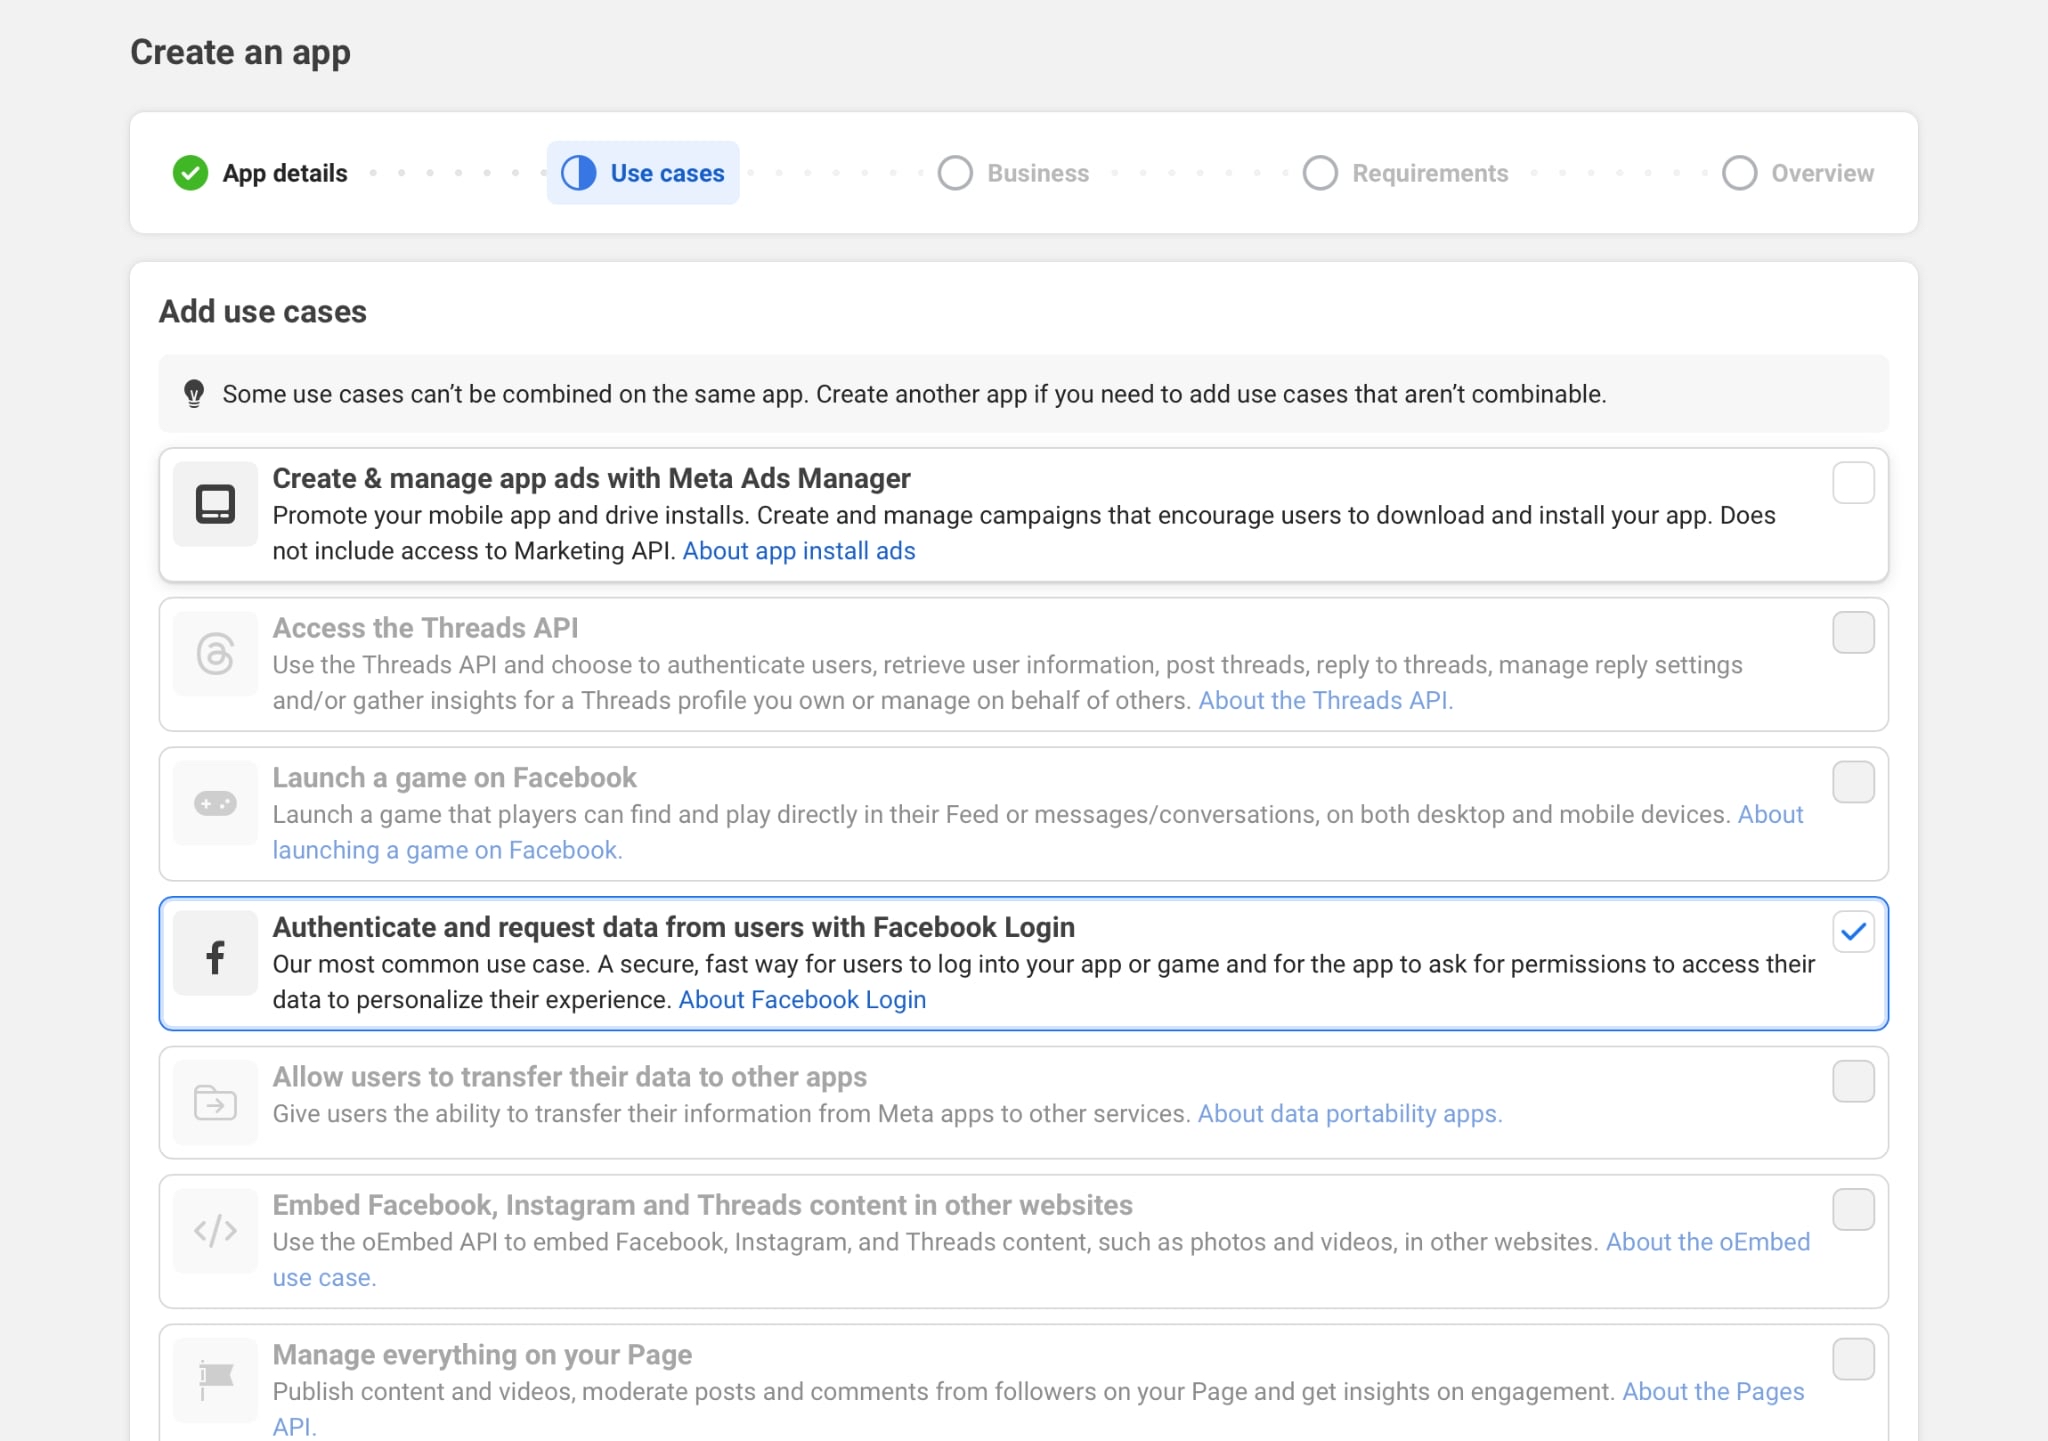
- Choose the use cases for your app. In this case, select Authenticate and request data from users with Facebook Login
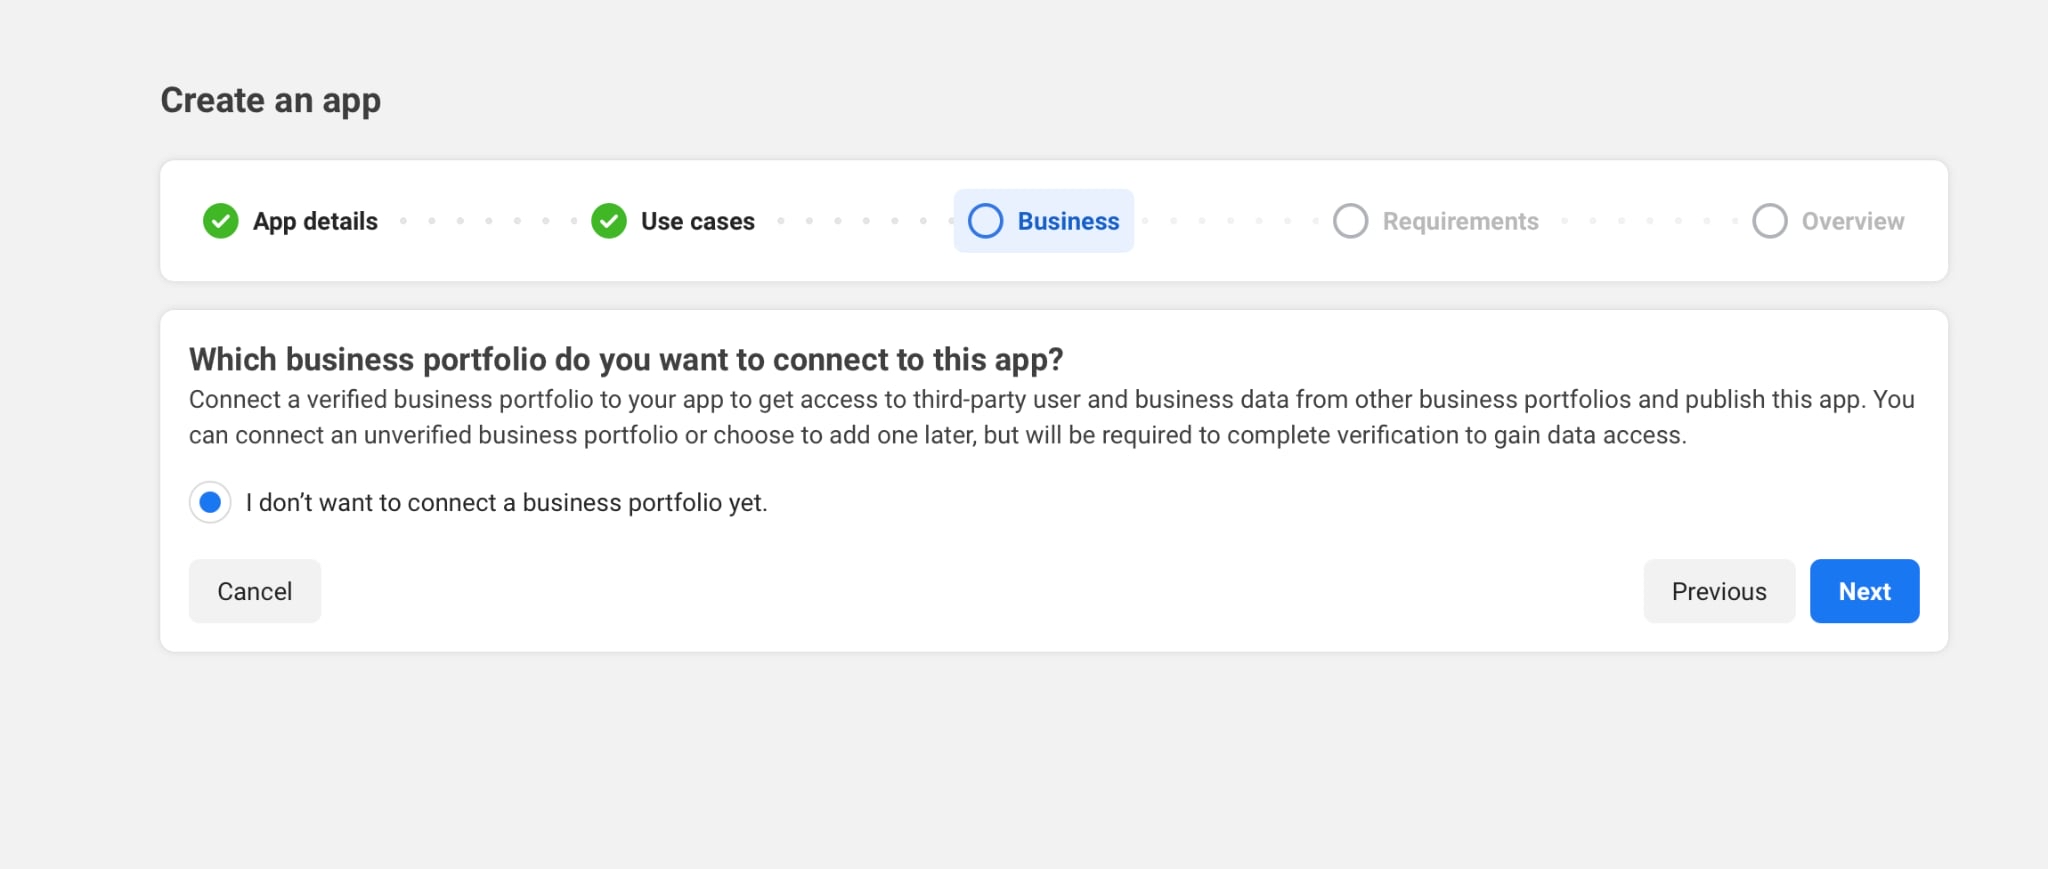
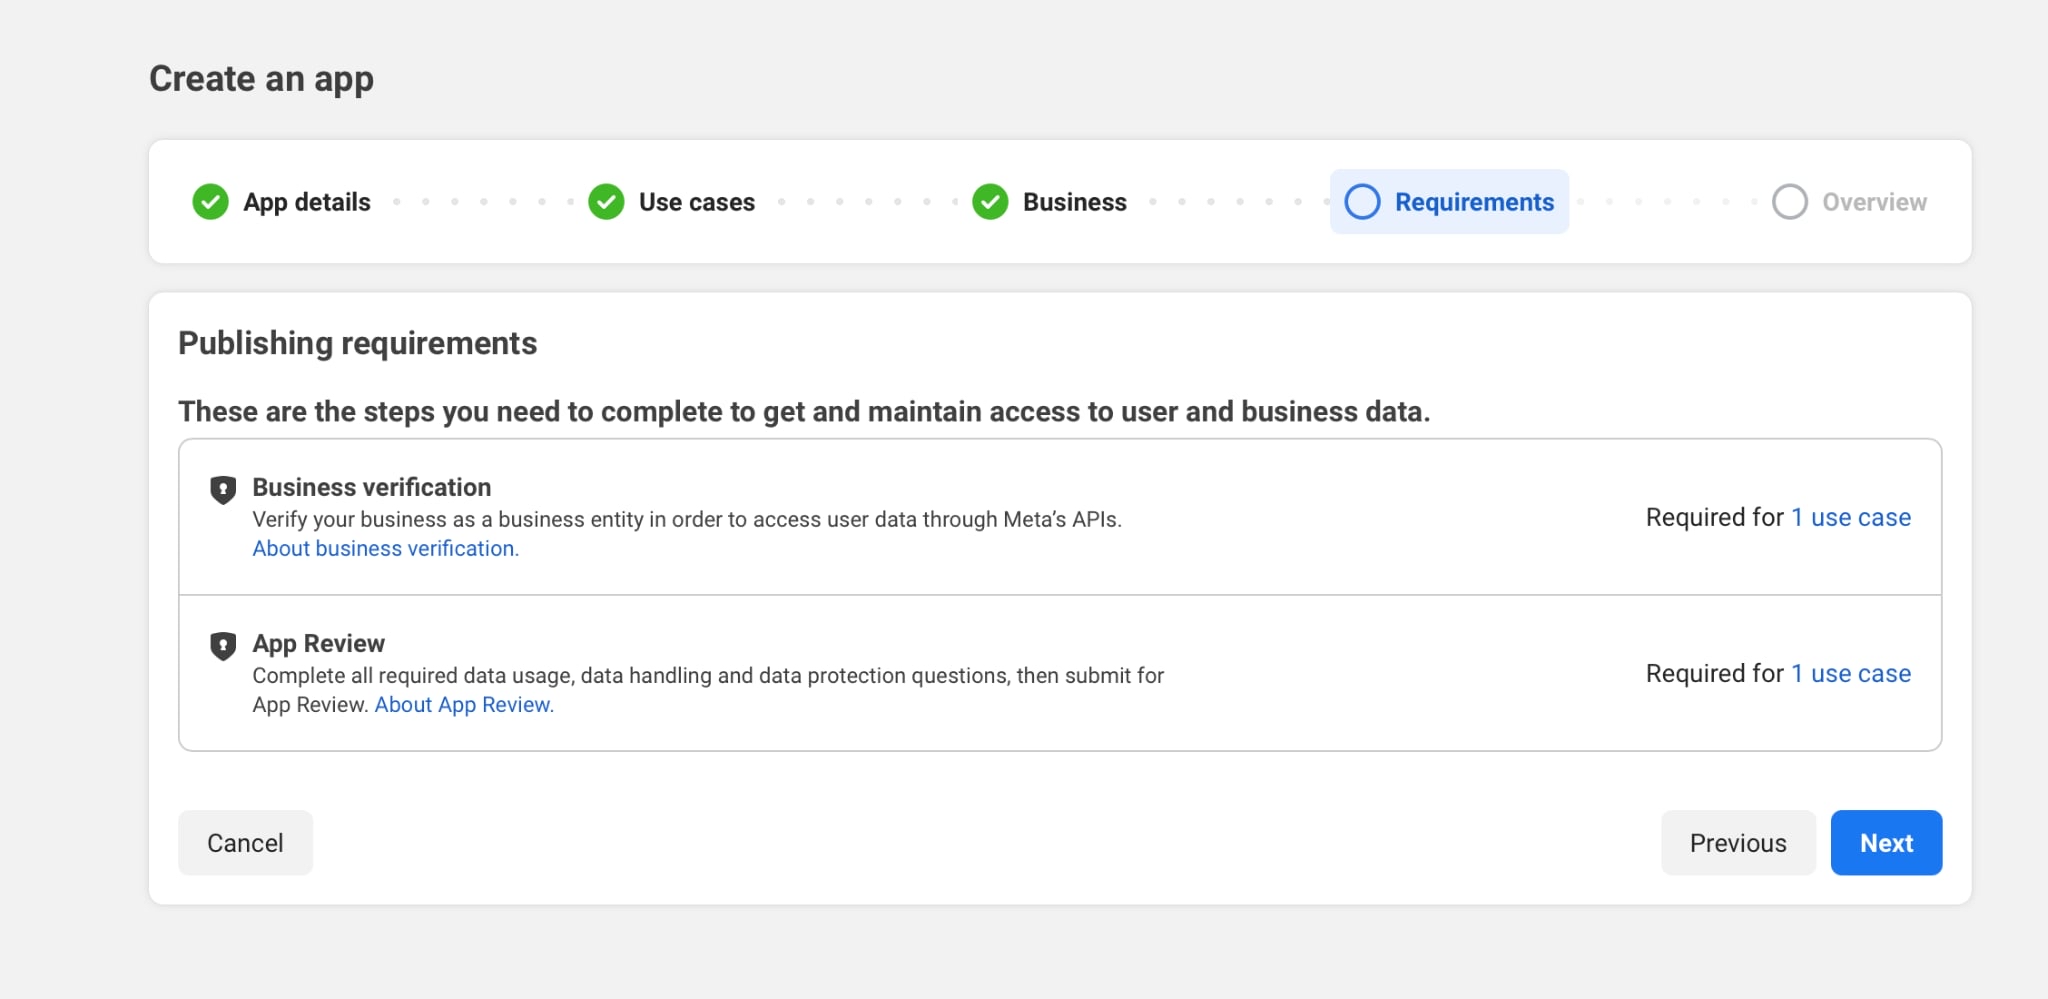
- Business and Requirements Steps: Just click Next. You can always change these setup later
- Recheck the App Overview. Once everything looks fine, finish by clicking Create App
3. Retrieve App ID and App Secret. Supply Bundle ID (iOS) and Package Names (Android)
Once you have successfully created the app, you need to obtain two important keys for setting up Firebase later: the App ID and App Secret. Additionally, you need to register your app's Bundle ID and Package Names.
Follow these steps:
-
After successfully creating the app, go back to All Apps, then select your app. You will be redirected to the App Dashboard
-
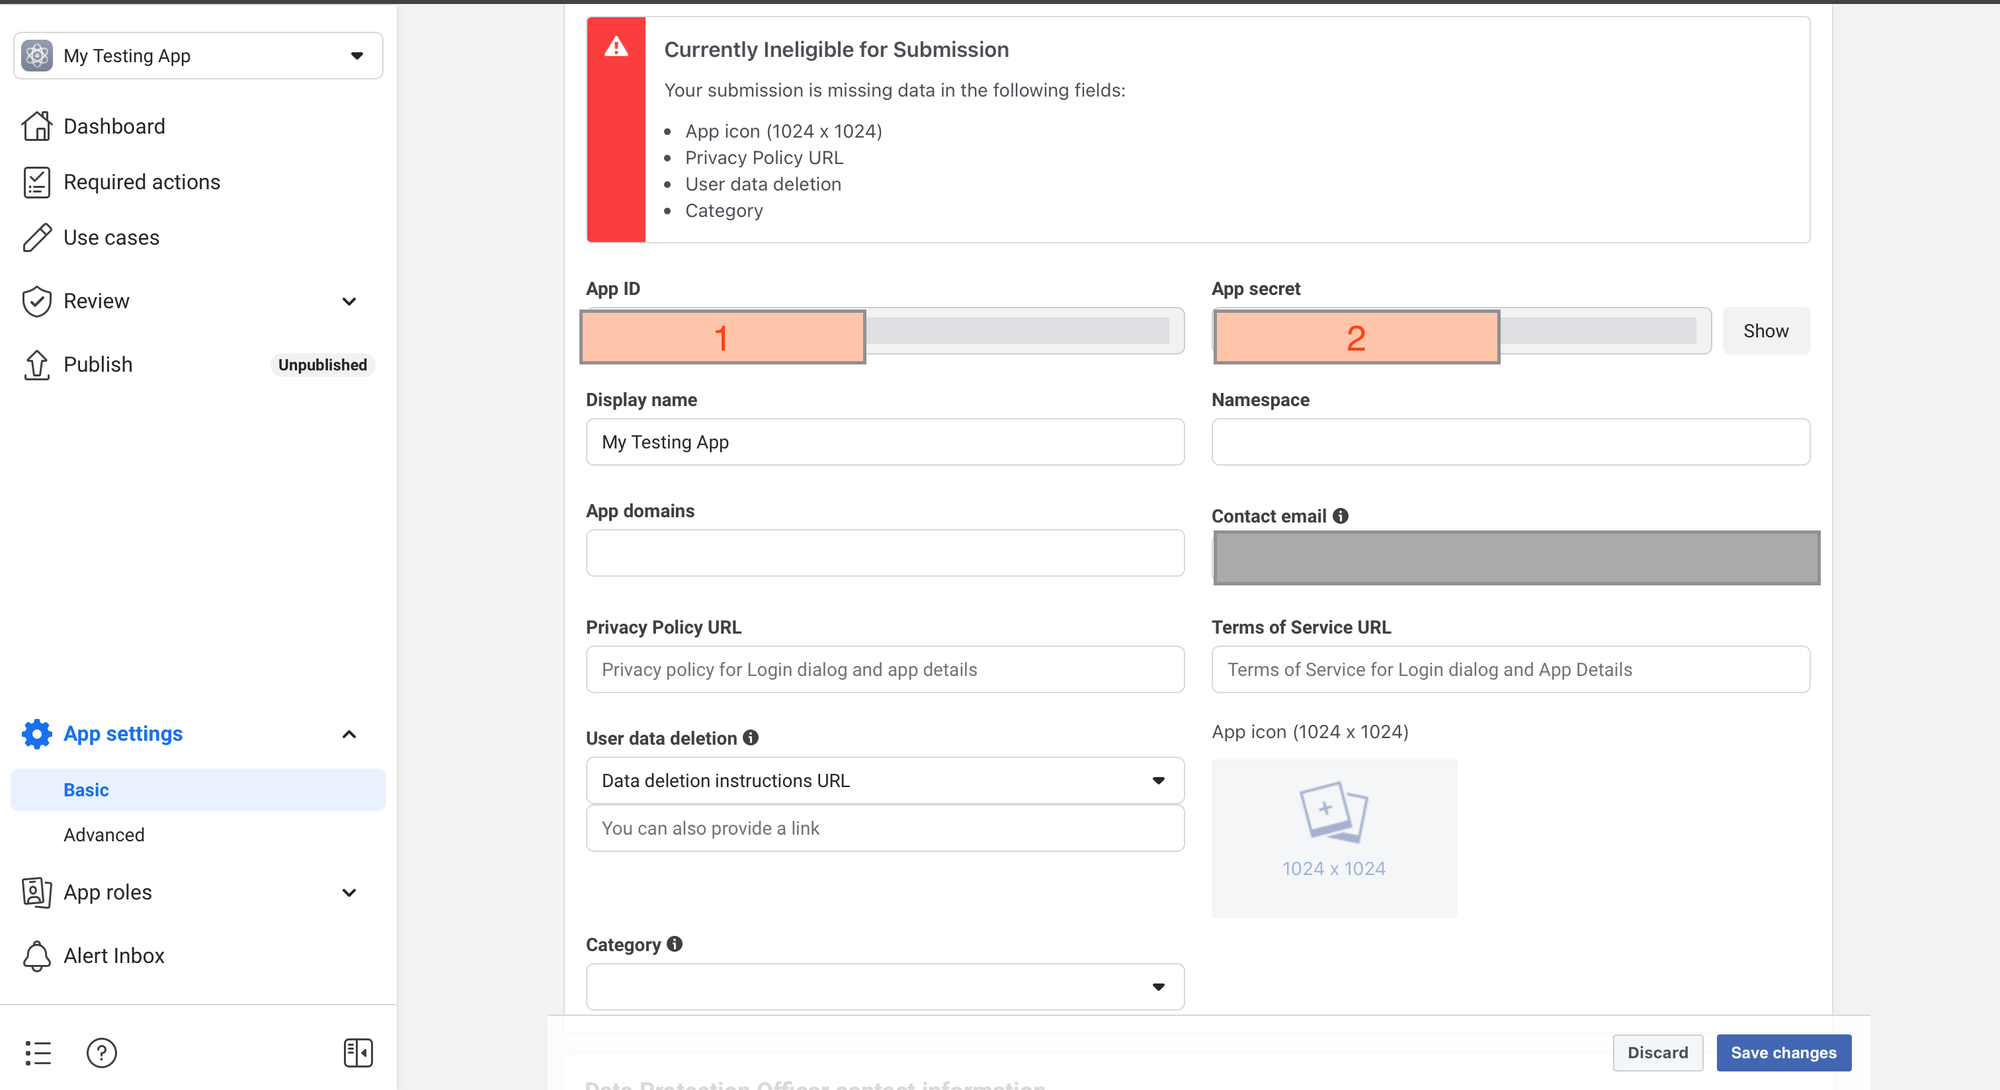
On the left navigation bar, expand the App settings dropdown and select Basic
-
Now you can see your App ID and App Secret. Take note of them and keep them safe ^^
-
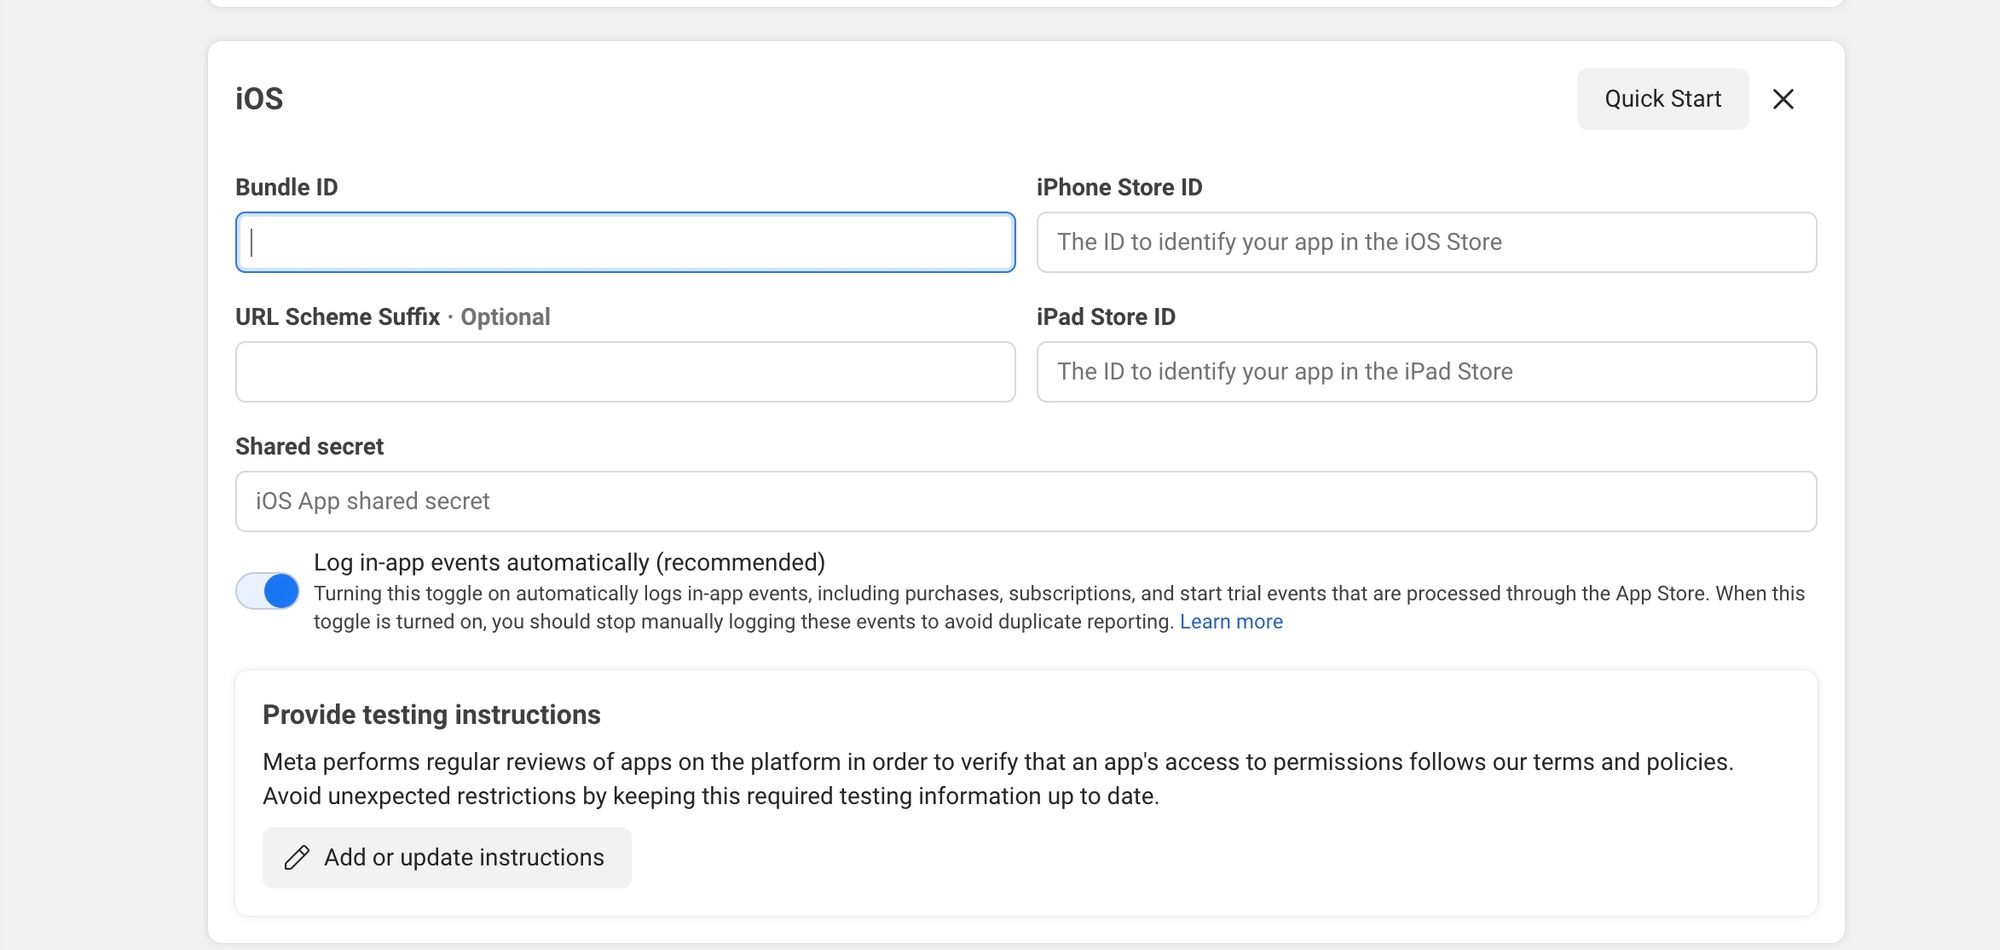
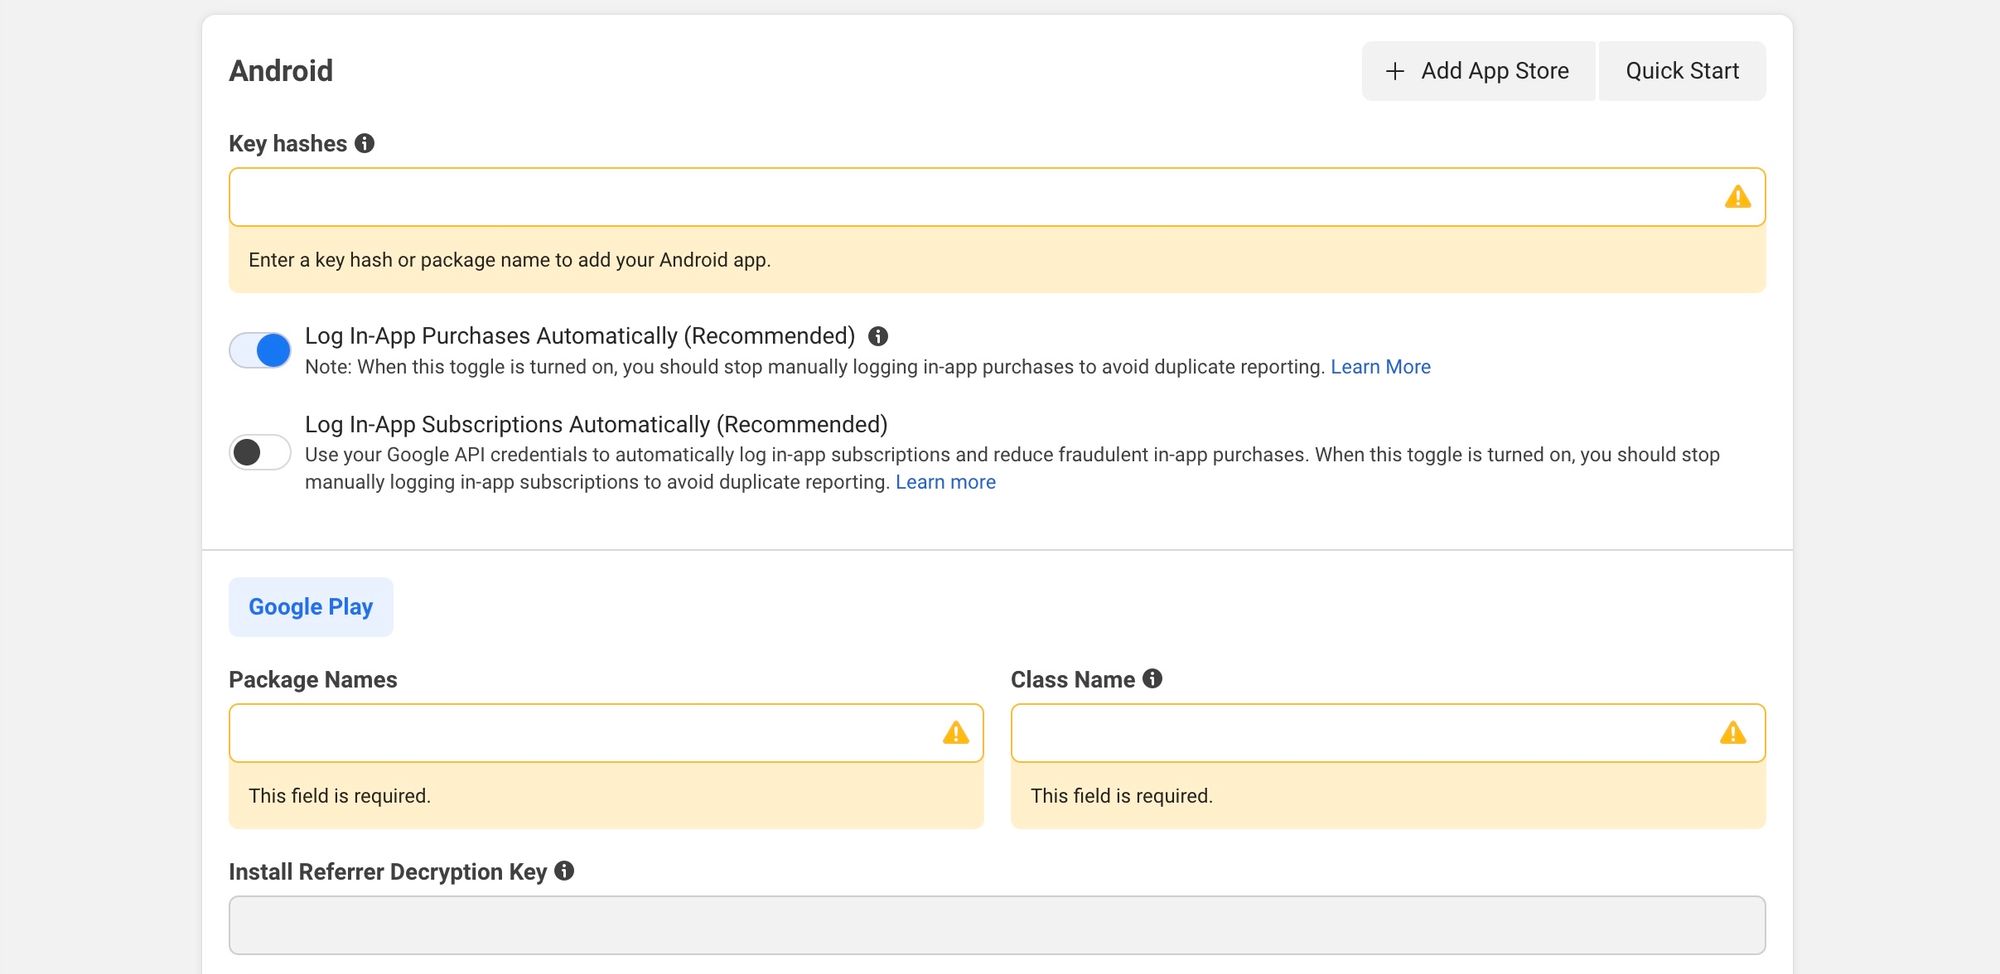
Scroll to the end of the current screen; you may see the Add platform button. You need to create one for iOS and one for Android to provide your App Bundle ID and Package Names. Refer to the following images to see how to do this:
- Step 1: Click Add platform

- Step 2: Select iOS and Android
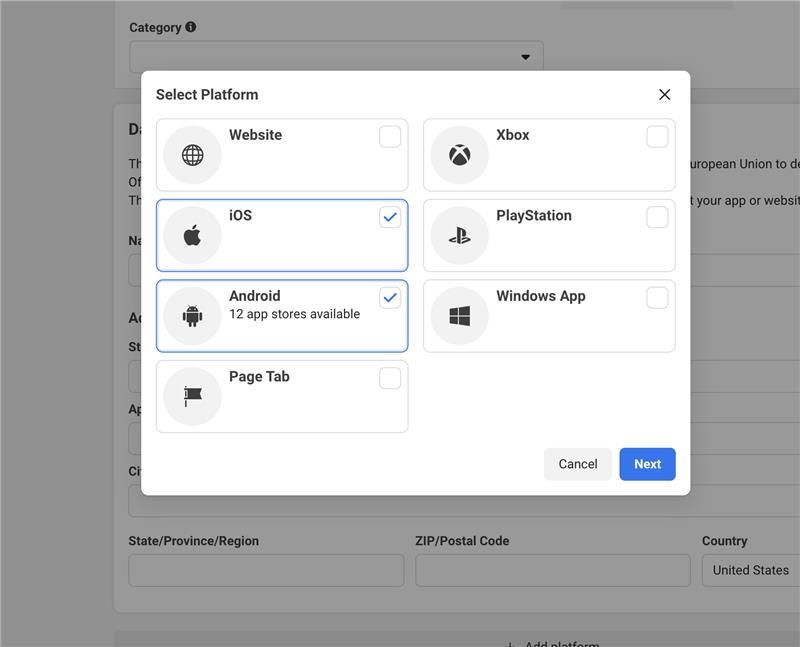
- Step 3: Fill in the required fields for each platform
4. Firebase: Facebook Sign-In Setup
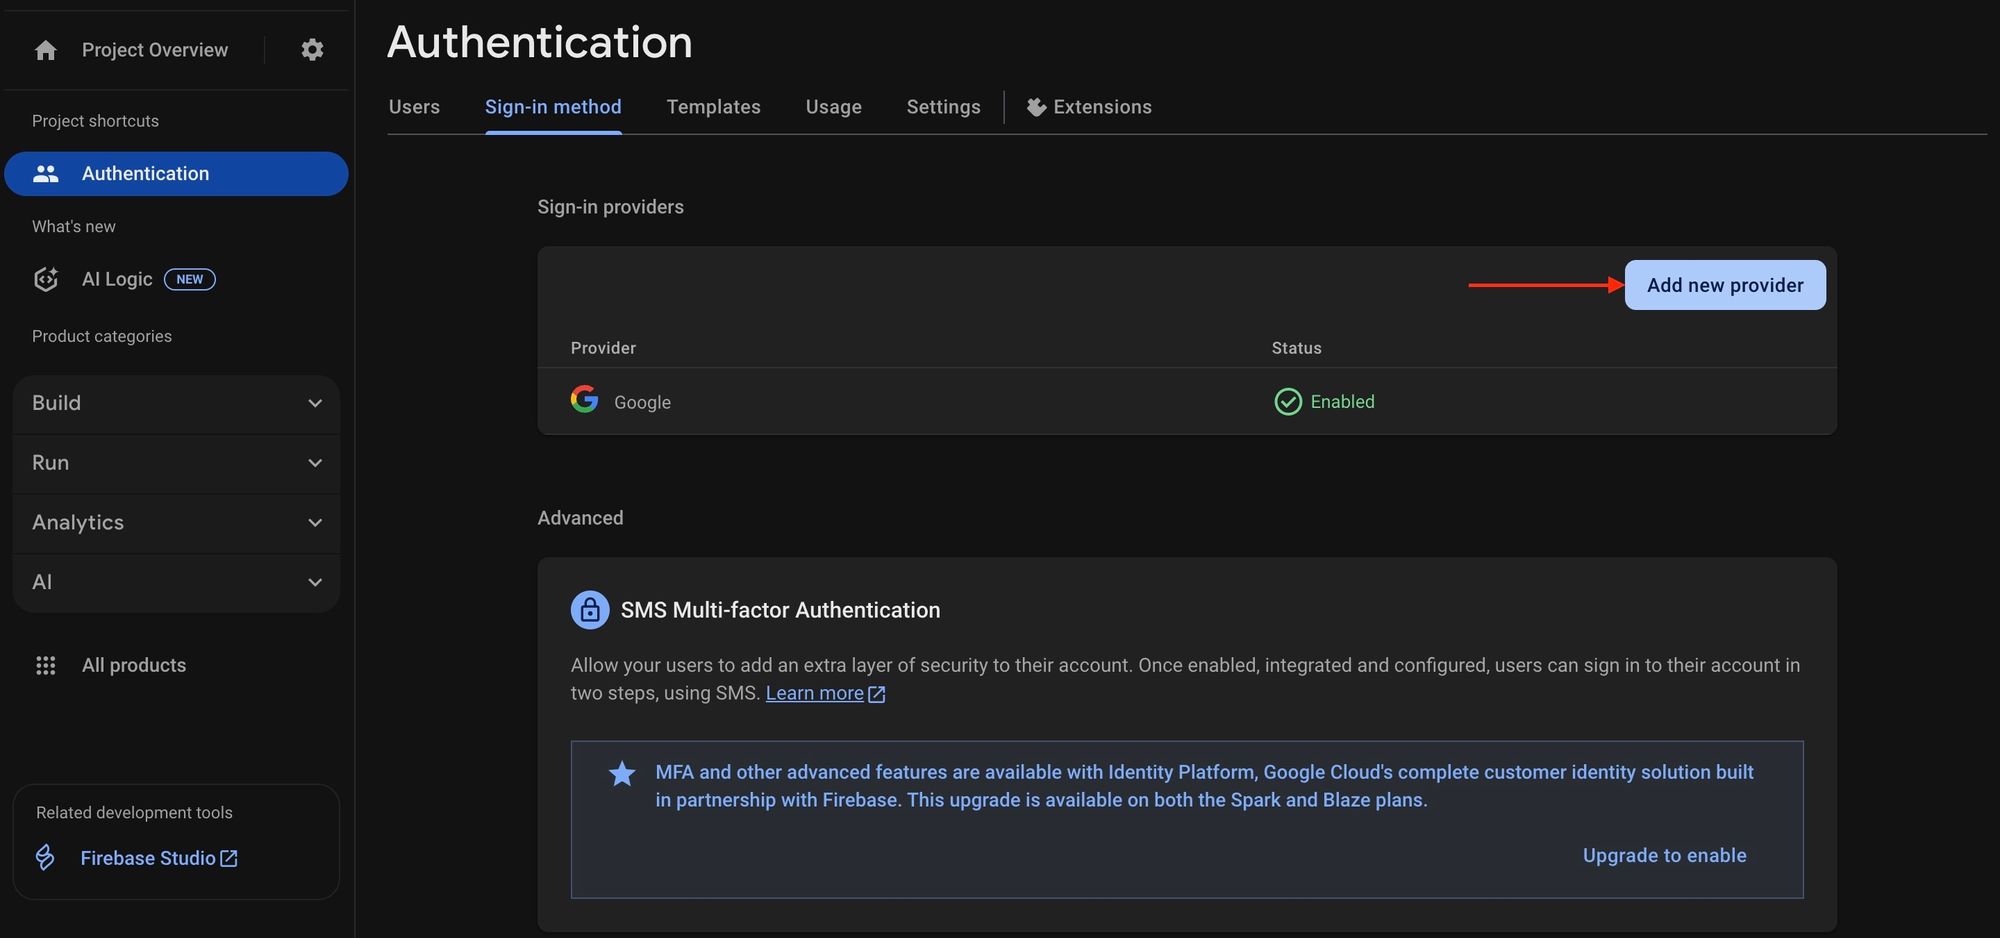
- In the Firebase Console, select the Authentication section
- Select the Sign-in method tab, then click Add new provider
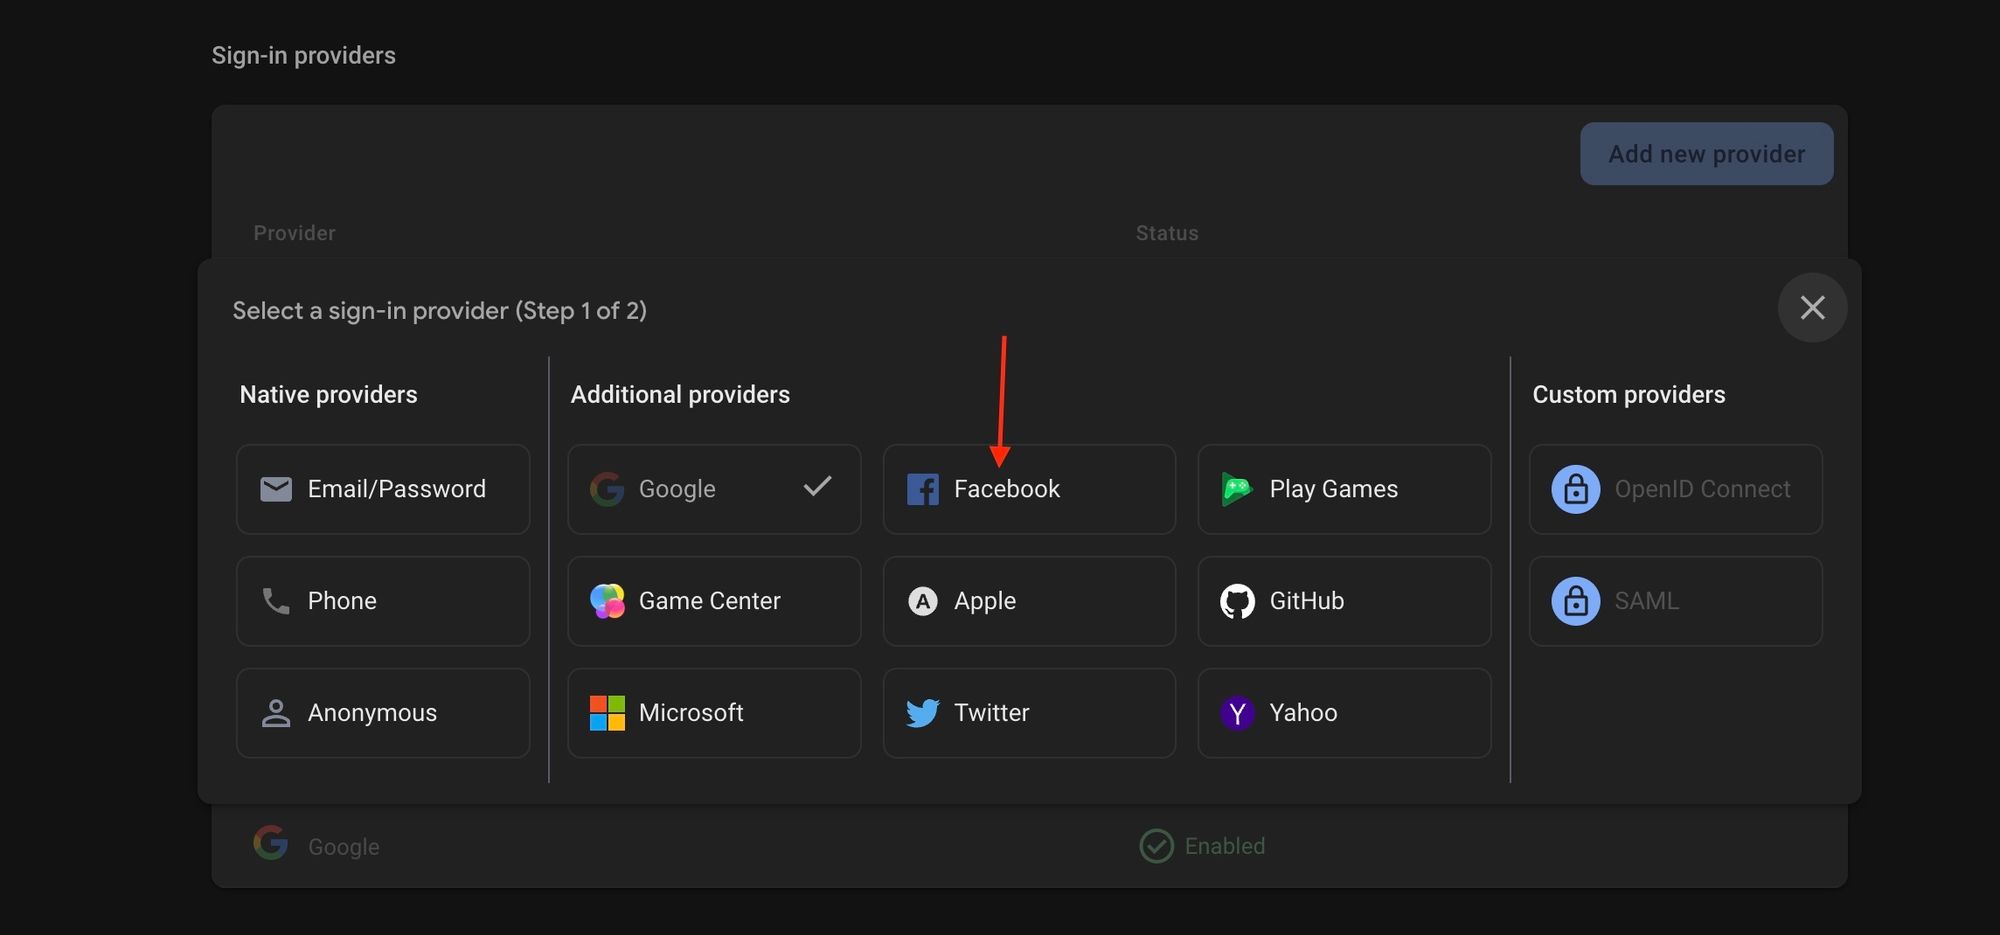
- Select Facebook
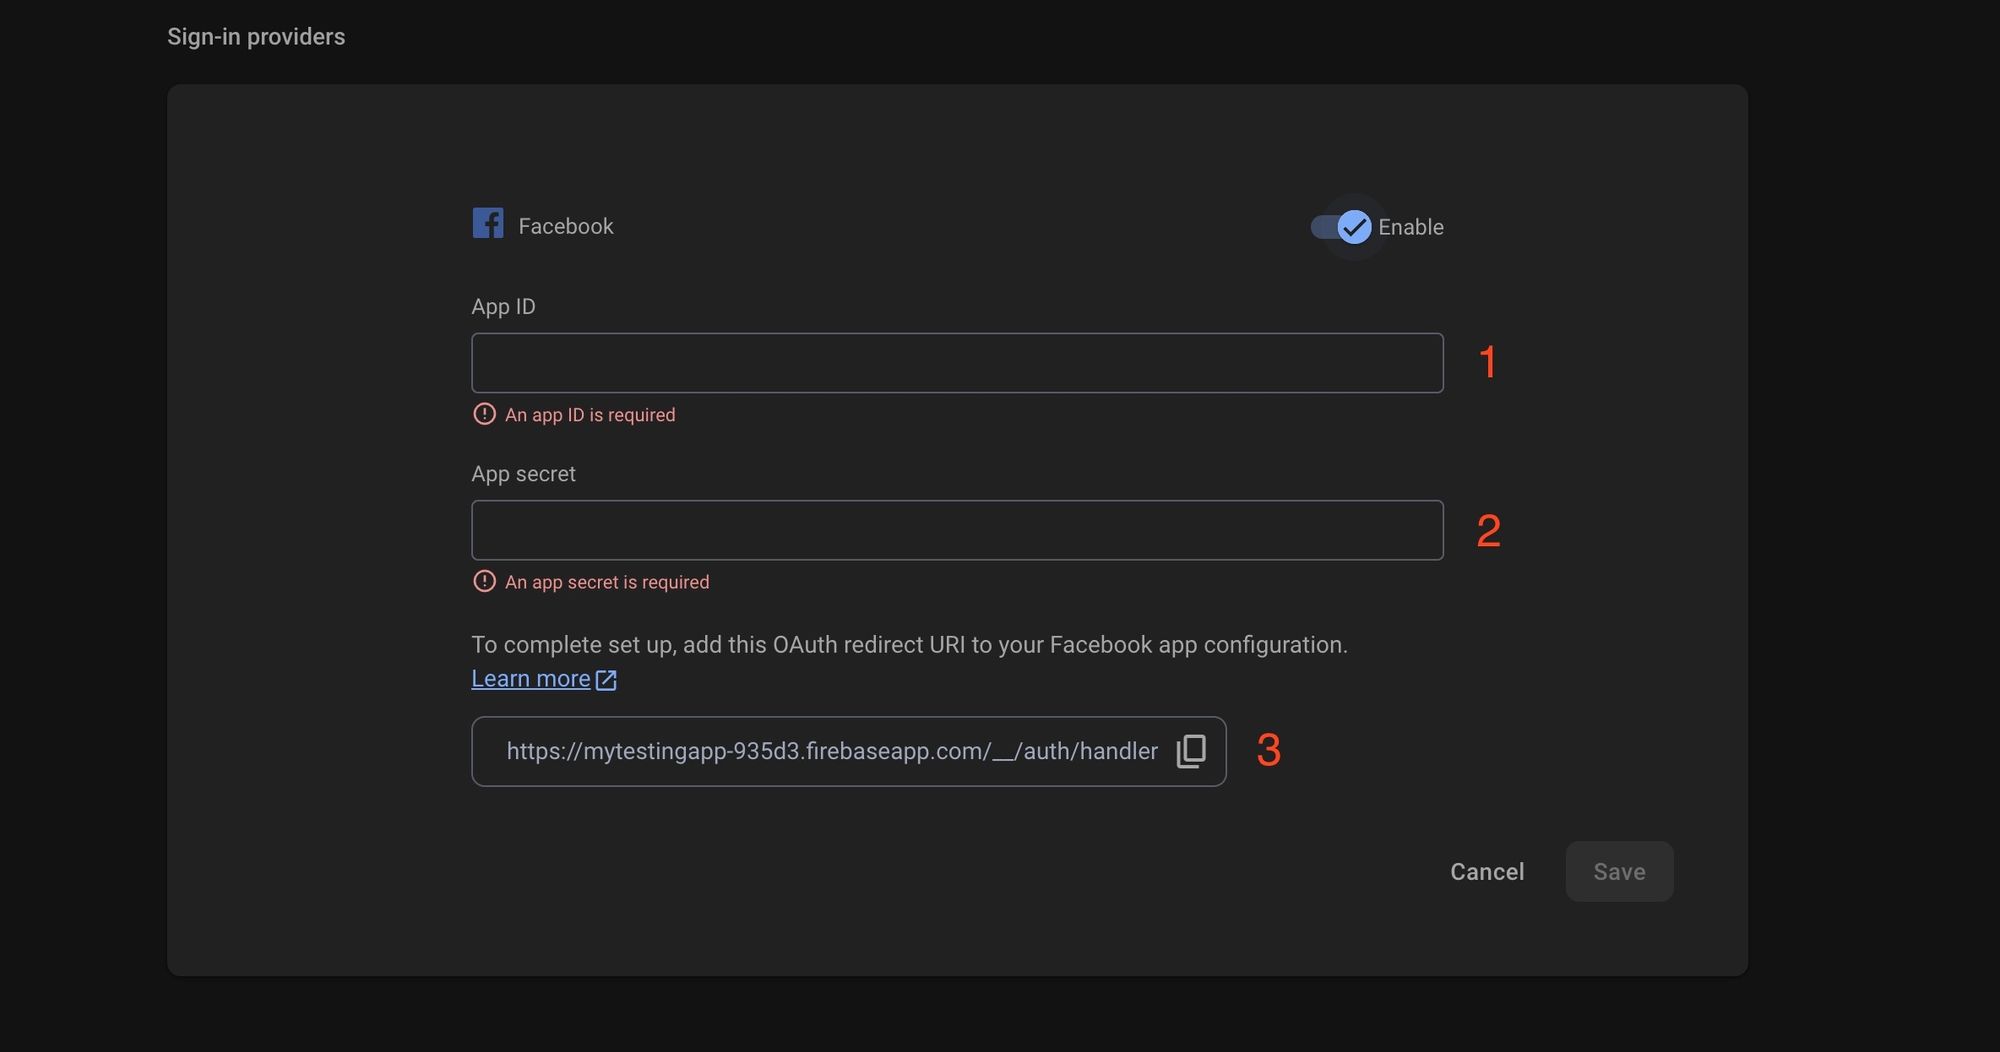
- Remember the keys I told you to keep safe in Step 3? Now, take them out and fill in the following required fields (1) and (2). Then, copy the OAuth redirect link in (3), we will need this link for the next step:
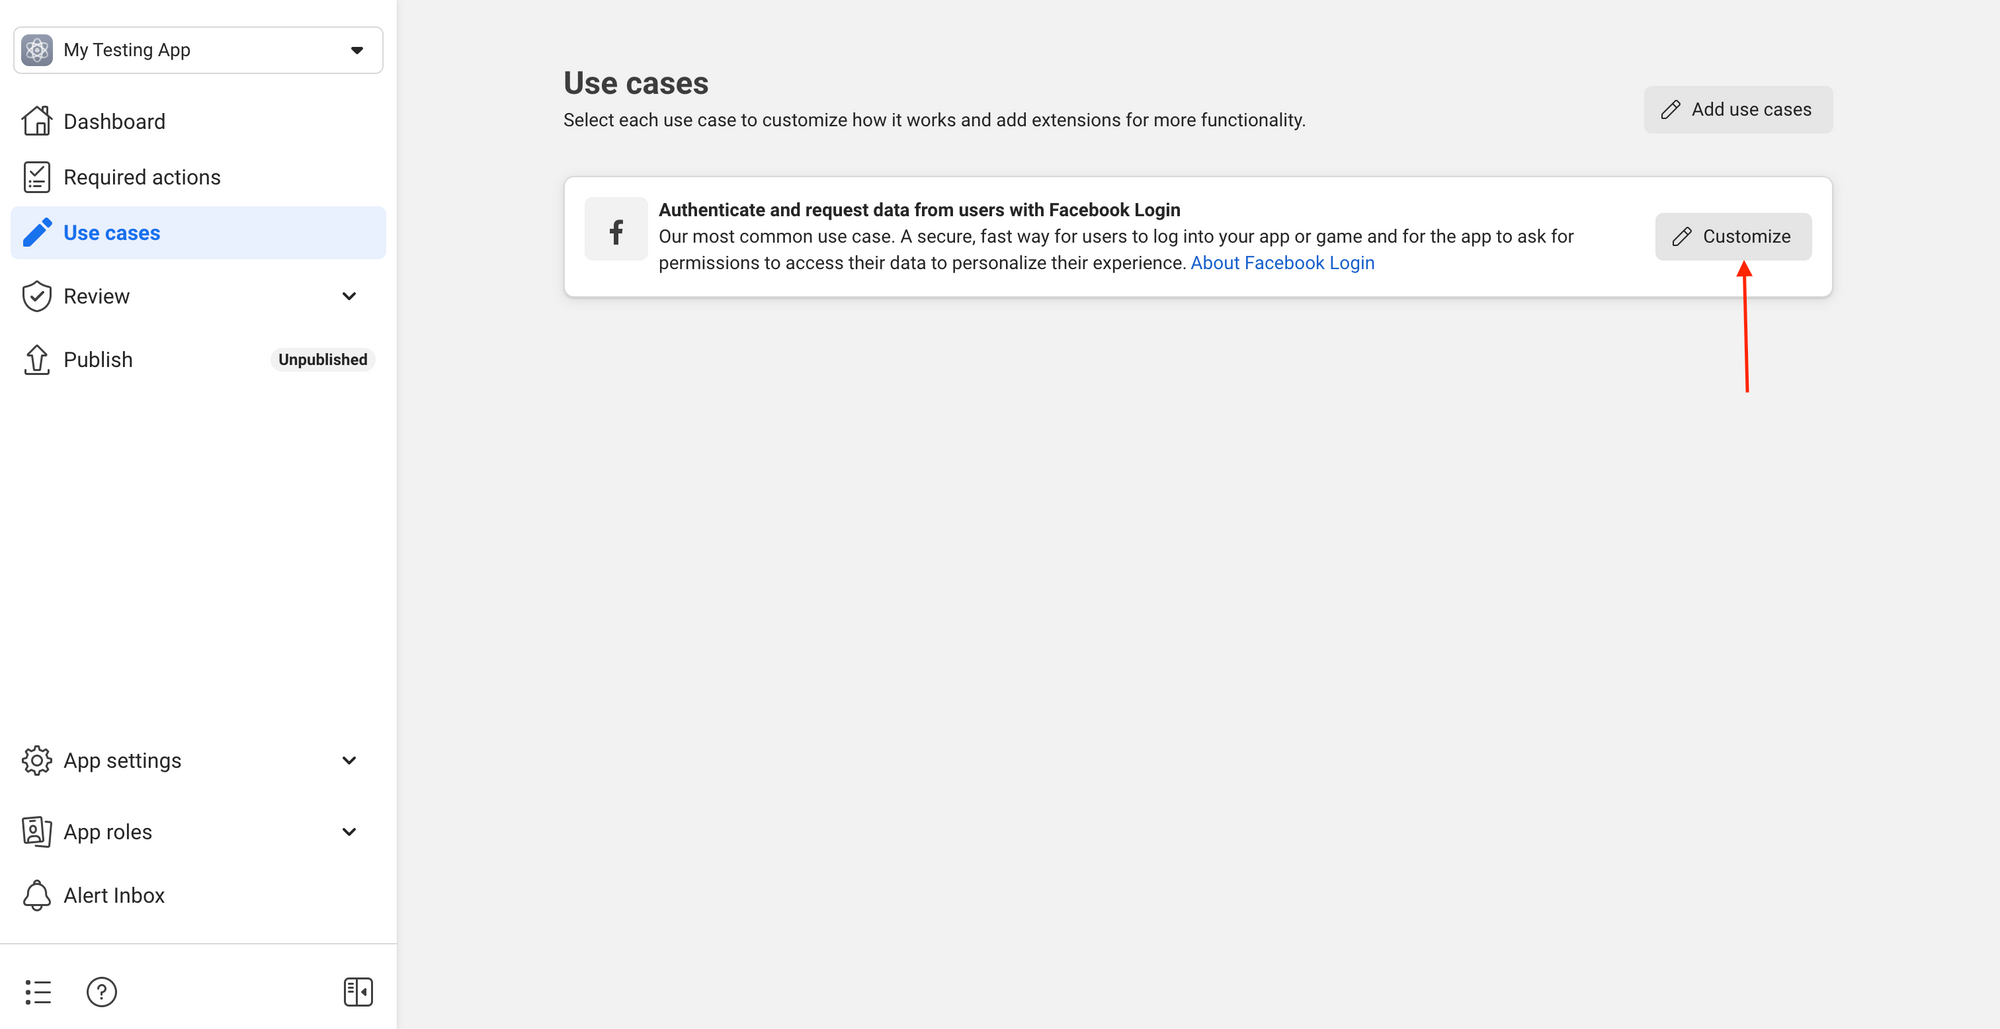
- Return to the App Dashboard. Chaiyo! We are almost finished with this complicated setup. On the left navigation bar, select Use cases. Then choose the use case to authenticate that we selected earlier and click Customize:
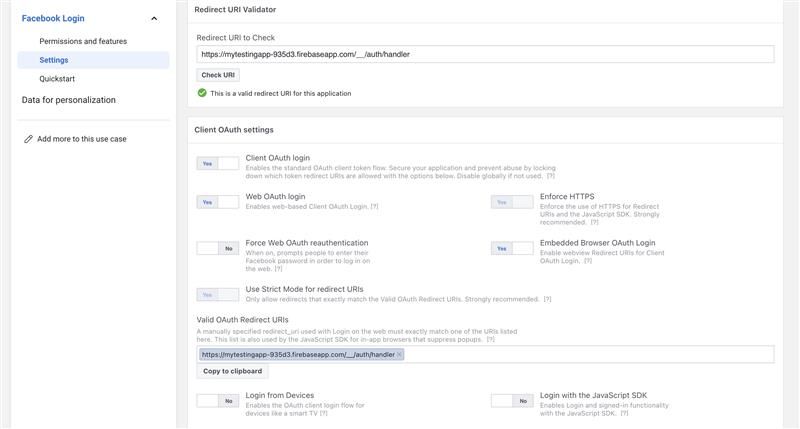
- Paste the link that you copied in Step 3 into the Valid OAuth Redirect URIs field. Make sure to validate this link in the Redirect URI to Check input and verify it first. Alternatively, you can refer to the image below and make a copy for yourself:
Completed. That was quite a long process for this configuration, right? Let's move on to coding, I can't wait ^^.
5. Configure React Native FBSDK Next module
In the app.json file, add the config plugin to the plugins array. I will reuse the file that I introduced in my previous blog.
{
  "expo": {
    "android": {
      // Path to the file downloaded in Step 3
      "googleServicesFile": "./google-services.json",

      /* Replace with your app's package name */
      "package": "com.mycorp.myapp"
    },
    "ios": {
      // Path to the file downloaded in Step 3
      "googleServicesFile": "./GoogleService-Info.plist",

      /* Replace with your app's bundle ID */
      "bundleIdentifier": "com.mycorp.myapp"
    },
    "plugins": [
      "@react-native-firebase/app",
      "@react-native-firebase/auth",
      "@react-native-firebase/crashlytics",
      [
        "expo-build-properties",
        {
          "ios": {
            "useFrameworks": "static"
          }
        }
      ],
      [
      "react-native-fbsdk-next",
        {
          // Replace with your App ID, Display Name, and scheme (fb + App ID)
          "appID": "679xxxxxxxxxxxx",
          "displayName": "mytestingapp",
          "scheme": "fb679xxxxxxxxxxxx",
          "advertiserIDCollectionEnabled": false,
          "autoLogAppEventsEnabled": false,
          "isAutoInitEnabled": true,
          "iosUserTrackingPermission": "This identifier will be used to deliver personalized ads to you."
        }
      ]
    ]
  }
}
6. Handle Facebook Sign-In
We will extend the previous useAuth.tsx file to include the Facebook Sign-In function.
import { useContext } from 'react';
import { AuthContext } from 'context/AuthContext';
import { GoogleAuthProvider, getAuth, signInWithCredential, FacebookAuthProvider } from '@react-native-firebase/auth';
import { GoogleSignin } from '@react-native-google-signin/google-signin';

/* Use for Facebook Sign In */
import { Platform } from 'react-native';
import { AccessToken, AuthenticationToken, LoginManager, Profile } from 'react-native-fbsdk-next';
import FBAccessToken from 'react-native-fbsdk-next/lib/typescript/src/FBAccessToken';
import FBAuthenticationToken from 'react-native-fbsdk-next/lib/typescript/src/FBAuthenticationToken';
import { sha256 } from 'react-native-sha256';
import uuid from 'react-native-uuid';

GoogleSignin.configure({
 webClientId: '',
});

LoginManager.setLoginBehavior('web_only'); // 'web_only' often prompts account choice

export function useAuth() {
 const { user, setUser } = useContext(AuthContext);
 const auth = getAuth();

 async function onGoogleSignIn() {
   await GoogleSignin.hasPlayServices({ showPlayServicesUpdateDialog: true });

   const signInResult = await GoogleSignin.signIn();
   let idToken = signInResult.data?.idToken ?? signInResult?.idToken;
   if (!idToken) throw new Error('No ID token found');

   const googleCredential = GoogleAuthProvider.credential(idToken);
   const userCredential = await signInWithCredential(auth, googleCredential);
   const firebaseUser = userCredential.user;

   setUser({
     displayName: firebaseUser.displayName ?? '',
     email: firebaseUser.email ?? '',
     photoURL: firebaseUser.photoURL ?? '',
     uid: firebaseUser.uid,
   });
 }

 async function onFacebookSignIn() {
    // Create a nonce and the corresponding
    // sha256 hash of the nonce
     const nonce = uuid.v1() as string;
     const nonceSha256 = await sha256(nonce);
     const result = await LoginManager.logInWithPermissions(
       ['public_profile', 'email'],
       'limited',
       nonceSha256,
     );
     if (result.isCancelled) {
       throw 'User cancelled the login process';
     }

     let data : any = null;
     if(Platform.OS === 'ios')
     {
       data = await AuthenticationToken.getAuthenticationTokenIOS() as FBAuthenticationToken;
     }
     else {
       data = await AccessToken.getCurrentAccessToken() as FBAccessToken;
     }
     if (!data) {
       throw 'Something went wrong obtaining authentication token';
     }

     const facebookCredential = await FacebookAuthProvider.credential(data.authenticationToken, nonce);

     await signInWithCredential(auth, facebookCredential)
       .then((userCredential) => {
         const user = userCredential.user
         if(user) {
           setUser({
             displayName: user?.displayName ?? '',
             email: user?.email ?? '',
             photoURL: user?.photoURL ?? '',
             uid: user?.uid ?? '',
           });
         }
       })
       .catch((error) => {
         console.error('Facebook sign-in error:', error);
         throw error;
       }
       );
  }


 async function onSignOut() {
   try {
     if (user) {
       setUser(undefined);
       await auth.signOut();

       // You can first check which provider is used for the logged-in user
          (Google or Facebook).
       // And for each provider, call the respective signOut function.

       await GoogleSignin.signOut();
       await LoginManager.logOut();
     }
   } catch (error) {
     console.error('Sign-out error:', error);
   }
 }

 return {
   user,
   onGoogleSignIn,
   onFacebookSignIn,
   onSignOut,
 };
}
7. Integrate Facebook Sign-In into the Sign-In screen
Yay! We're just one step away from enjoying our reward. Let's create a button for Facebook Login on our Sign-In screen.
import { useEffect } from "react";
import { useAuth } from 'hooks/useAuth';
import { useNavigation } from '@react-navigation/native';
import {StyleSheet, Text, SafeAreaView, Button} from 'react-native';
import { GoogleSigninButton } from '@react-native-google-signin/google-signin';

const SignIn = () => {
    const {
        onGoogleSignIn,
        onFacebookSignIn,
        user
    } = useAuth();
    const { navigate } = useNavigation();

    {/* It would be better to refactor the code
    according to the Authentication Flows provided by React Navigation. */}
    useEffect(() => {
        if(user) navigate("Home")
    },[user])

    return (
        <SafeAreaView style={styles.container}>
            <Text style={styles.text}>Sign In</Text>
            <GoogleSigninButton
              size={GoogleSigninButton.Size.Wide}
              color={GoogleSigninButton.Color.Dark}
              onPress={() => onGoogleSignIn()}
            />;
            <Button
              onPress={() => onFacebookSignIn()}
              title="Continue With Facebook"
            />
        </SafeAreaView>
    );
};

const styles = StyleSheet.create({
  container: {
    flex: 1,
    justifyContent: 'center',
    alignItems: 'center',
    padding: 8,
  },
  text: {
    margin: 24,
    fontSize: 18,
    fontWeight: 'bold',
    textAlign: 'center',
  },
});


export default SignIn;
8. Final Thoughts
Integrating Facebook Login into our app was challenging, but the accomplishment is rewarding. This integration simplifies the login process, thus enhancing user experience and opening new engagement opportunities. With user permissions, we can access valuable data like age, age range, and gender, allowing us to personalize services, deliver targeted content, and better understand our user demographics. This integration positions us to harness the full potential of social connectivity and data-driven insights, ultimately driving our app's growth and success.