
Robot Framework is the popular choice when it comes to automating the testing of web applications that is Robot Framework. It is an open-source automated testing framework for acceptance testing and acceptance test-driven development (ATDD).
Using a keyword-driven syntax that allows testers to create test cases using keywords and libraries. Going ahead, let’s setup Robot Framework with Python and run your first test.
This article will guide you a step by step to get started.
Step 1 - Download and Install Python
Step 2 - Install Robot Framework
Step 3 - Download and Install PyCharm
Step 4 - Create and Run the first test with Robot Framework and Python
Step 1 - Download and Install Python
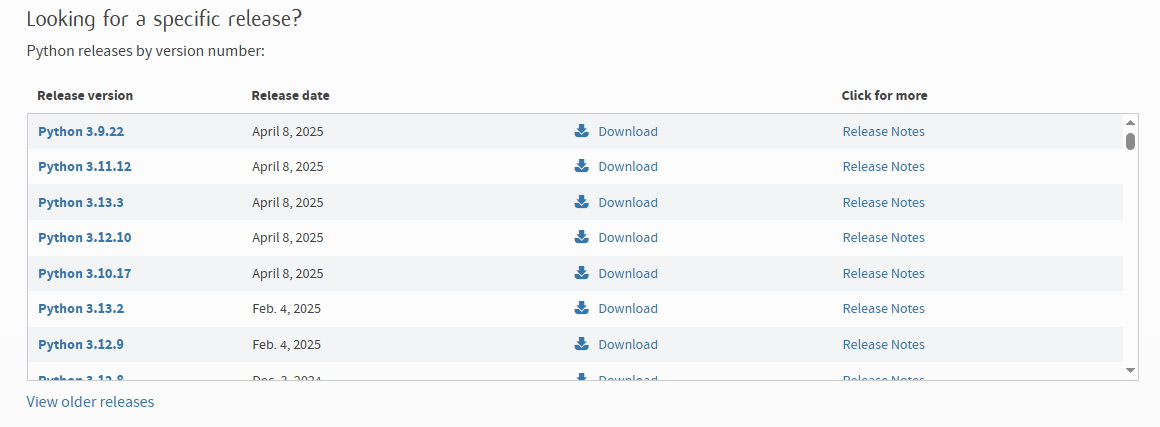
1.1 - Download Python
■ Go to the website: https://www.python.org/downloads/
Download python file according to the Windows, Linux, or macOS platform being used.
1.2 - Install Python
■ Double click the installer file
■ Check two checkbox below to install Python for all systems users and add Python into PATH variable after installation. You can also manually add Python to the PATH environment variable later.
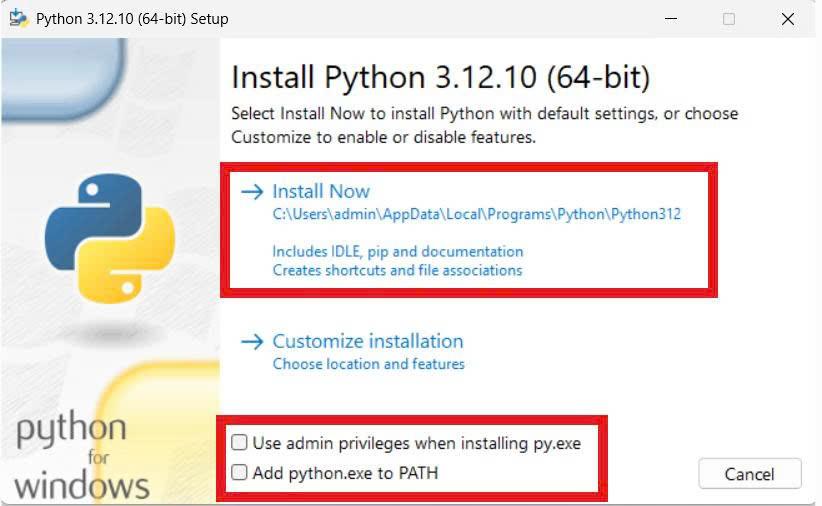
■ Then click "Install Now"
■ Install Python successfully.
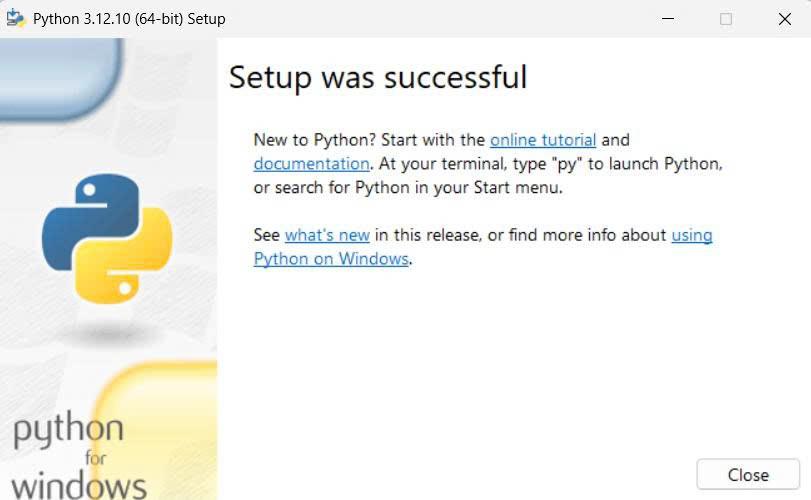
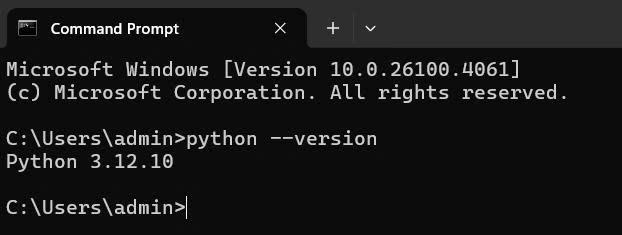
■ Verify Python installation open Command Prompt and check version python
If it doesn't work, check your environment variables and add Python to the Path manually.
- Click on Start, search for "Edit environment variables for your account" and click on that
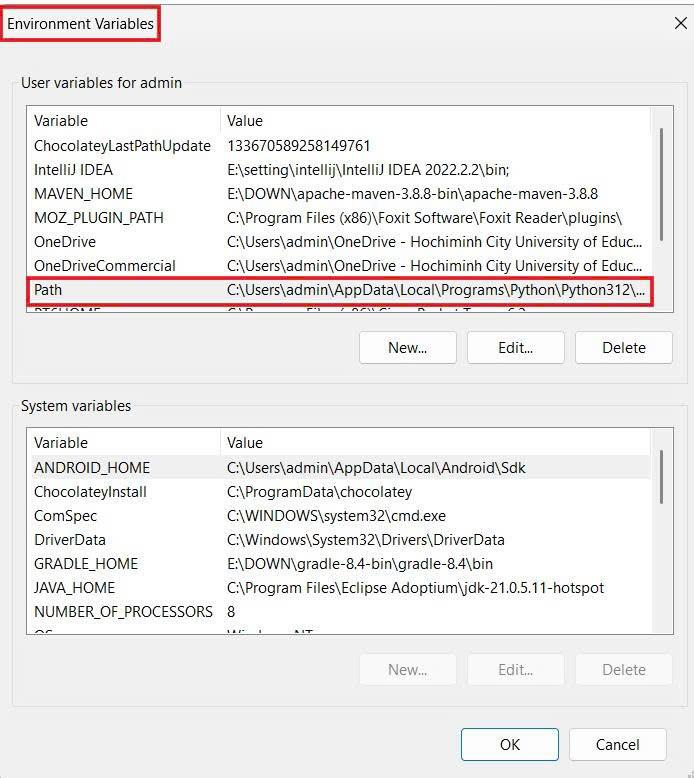
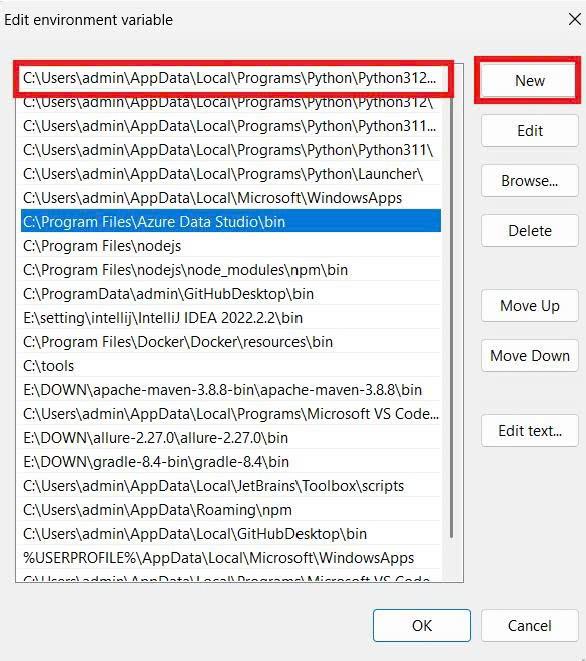
- Click Path to check environment like image below. If not have, click "New" to add Path and click "OK" to save this path
Step 2 - Install Robot Framework
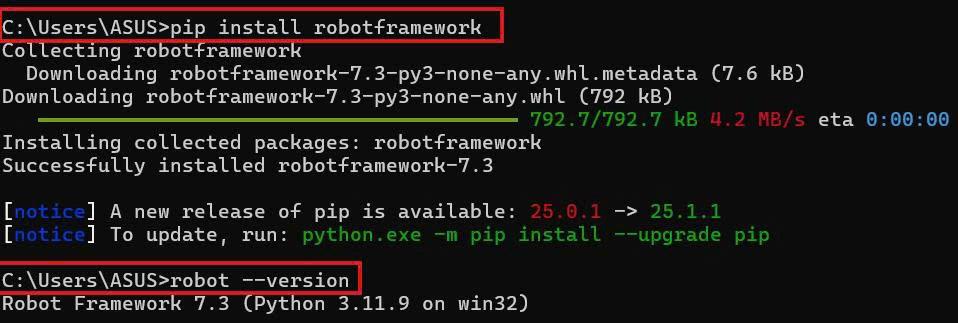
- Open Command Prompt
- Run the command – ‘pip install robotframework’
- Verify the installation with command – ‘robot –-version’
Step 3 - Download and Install PyCharm
■ Go to: https://www.jetbrains.com/pycharm/download/?section=windows
Choose the right version based on your operating system.
More detail setup PyCharm https://www.jetbrains.com/guide/python/tutorials/getting-started-pycharm/installation-and-setup/
Step 4 - Create and Run the first test with Robot Framework
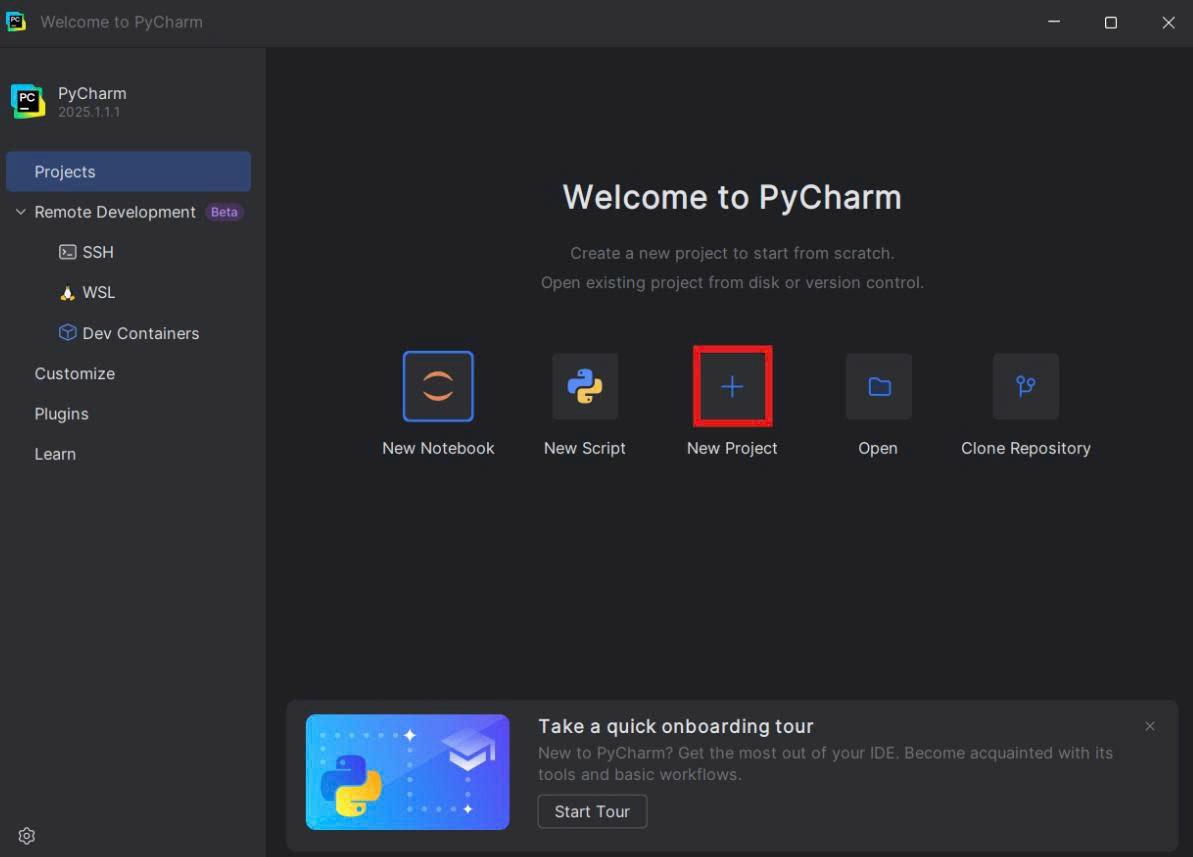
- Open PyCharm and click "New project"
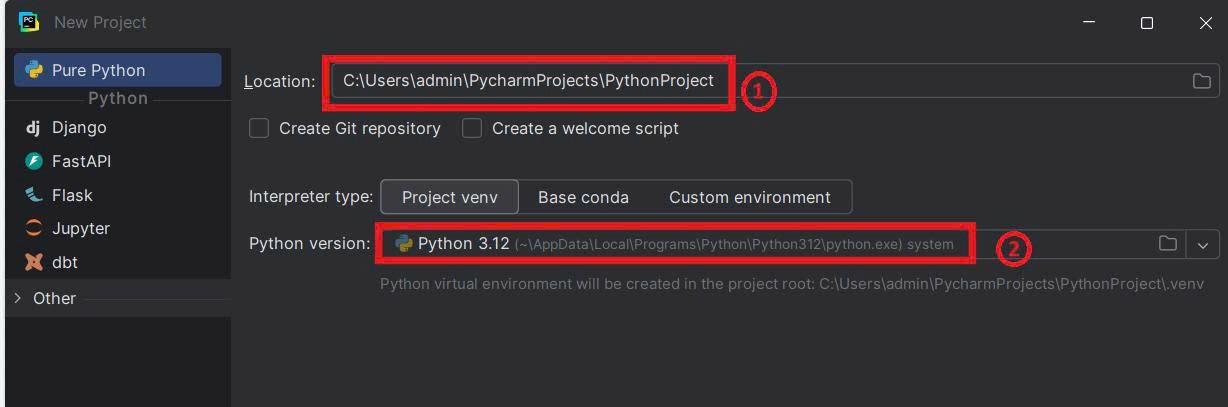
- Choose location to save your project and path your python
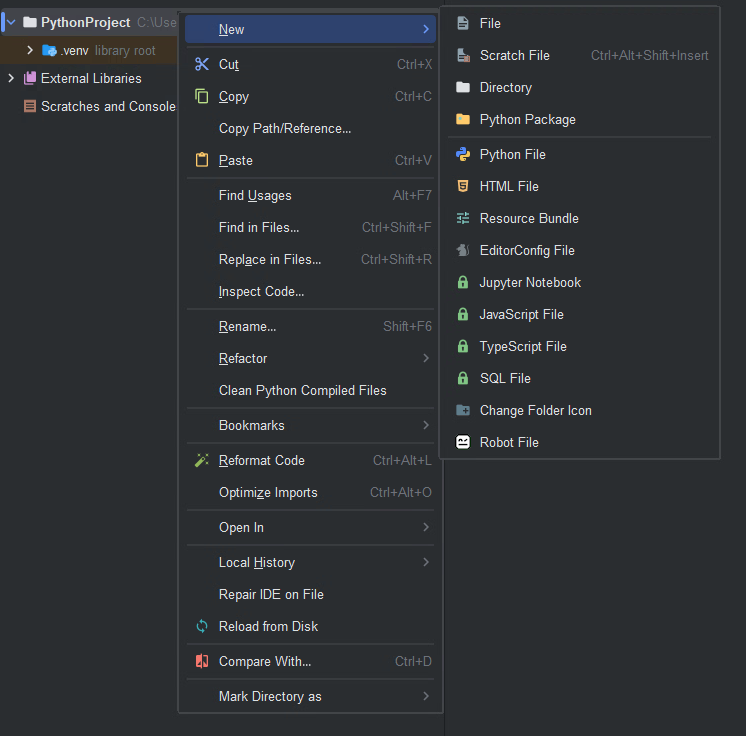
- Create a new .robot file e.g TC.robot
- Add the following test case into TC.robot file
*** Test Cases ***
Testcase1
   log    Hello World!
5. Type command – ‘robot TC.robot" to run testcase. In console log will displayed PASS if your TC is correct
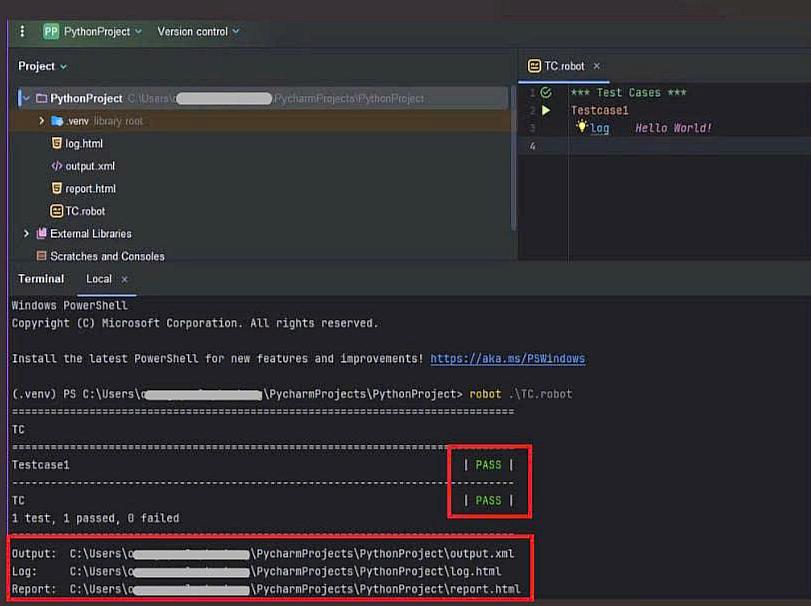
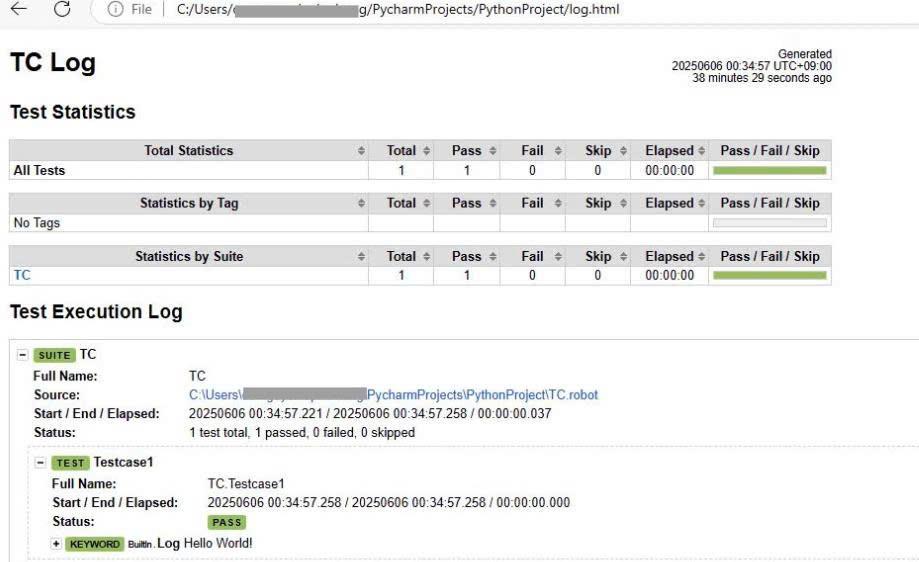
After run file robot, you'll also get the output files and see it when open browser
output.xml
report.html
log.html
Beside that, you can extend your framework by integrating powerful tools like SeleniumLibrary for browser automation. Remember that, you need to download the latest Chrome/Firefox driver and put it in the directory PYTHON_HOME\Scripts
Conclusion
Getting started with Robot Framework is easier. With the power of Robot Framework's keyword-driven approach, you can build your first automation tests with minimal setup.